To begin, I did a series of sketches in pencil. I did approximately twenty quick sketches and picked out the ones that I liked the most (with some input from my wife and a neighbor). These are the pencil sketches that I presented to the client.


 This one was my personal favorite but the client liked the third option the best. The next step was for me to make a cleaner drawing. I did this by transferring the image onto bristol board by using my light box.
 A light box is a great tool to have. It is very similar to the tool you see in the doctor's office to view x ray film. I placed the original rough on the lightbox and a clean piece of bristol board on top. The light coming from below makes it easy to trace the image. The benefit of this is you have a very clean drawing on professional quality paper. During the sketching stage, I use a much lighter weight paper since I do so many of them and most end up not being used.
I usually use Adobe Photoshop in most of my artwork because I like the painterly effects that it gives you. When I do illustrations for clients that will be utilizing the artwork in a variety of different sizes (coffee mugs, business cards, up to large banners) I use Adobe Illustrator instead. The reason is Photoshop is a bitmap program while Illustrator is a vector program. With Photoshop, when you enlarge it to a certain size, it begins to pixelate (you can see the little blocks) and lose quality. Since Illustrator is a vector program, you can enlarge or reduce it to virtually any size with no loss of quality making it ideal for commercial purposes.
With Illustrator, I work from back to front. The key to both Illustrator and Photoshop is to use lots of layers. The more layers you use, the easier editing is. You can make changes to a select area without negatively impacting the other areas. This is not meant as a tutorial on either program, just sharing my work process. There are lots of great tutorials out there from talented artists and when you purchase the program, Adobe has a great selection of tutorials to use and get you up and running.
I scanned in the pencilled image an pulled it up in Illustrator. First step was to create the wool.

Next comes the head, the ears and the bottom lip. The ears and the bottom lip are two separate layers and are located behind the head. The original pencil drawing is behind the whole drawing and I turn it on and off to make sure my placement is right. I also put a gradient on the shapes to give it some sense of shape and color.
 Next comes hair, eyebrows, nostrils and of course the eyes. These are all separate layers. The pupils are individual layers.
Next comes the rear, and the legs. The rear is tucked behind the wool on the sheep and each set of legs (front and rear) are on separate layers.
 Now is the time for the yarn. The other parts were relatively straightforward. With the yarn, I tried several different approaches and just was not happy with it. I even contemplating doing it in Photoshop and live tracing it in Illustrator. Ultimately what I did was draw it in Illustrator using strokes and deselecting each line to make it look like yarn. A little tedious but I think it works.
  Now for the coloring process on the yarn. The client wanted it to be multicolored like the beautiful yarn that she sells. Tried lots of different techniques and ended going with this. I also dropped a couple of gradient shadows under the sheep and shadow to give the image weight. Under the image is a screenshot of the coloring of the yarn with the yarn strokes hidden.
 The image was then presented to the client who loved it with one small request...a tail to be added. I was able to accommodate the request and here is the final image.
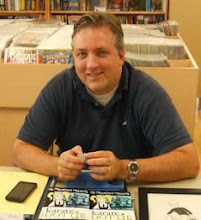
 As for my equipment, I use a Macbook (pictured to the right), Adobe CS3 and a Wacom tablet to do the digital side of my artwork. I prefer to use a laptop and the smaller wacom tablet because I travel quite a bit and prefer to be as portable as possible.